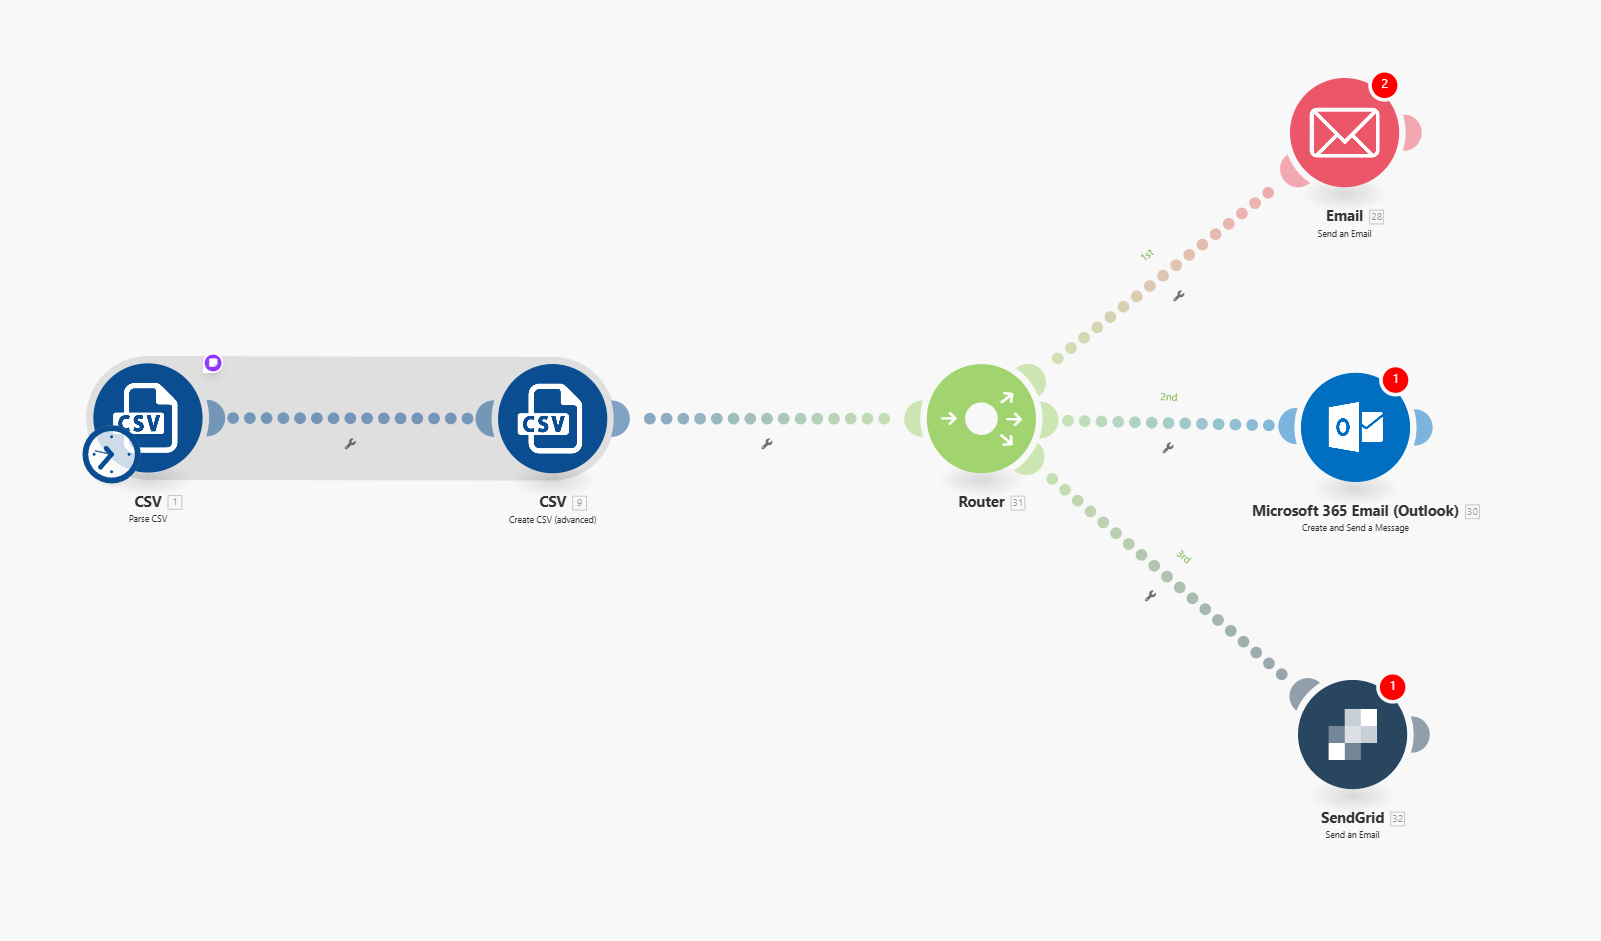
I’ve made a scenario that parses a CSV file and I want to send it as an email to myself, but none of the email modules work. Has anyone used any of the email modules in a scenario before?
Thanks
Hello @Admir_Ljubovic ,
You have to create a client for your email module in Google cloud console
HERE ARE THE STEPS INVOLVED:
1. Check if you’ve enabled Gmail API
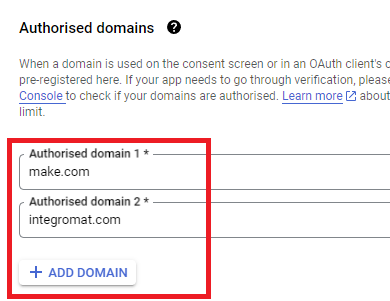
2. Go to Branding and input all necessary details, Add make.com as the authorized domains .
3. Go to Clients then create an oath client. Choose Web application then add a name for your app, then add :
As the authorized redirect URIs
4. Go to data access and add the following scopes:
-https://www.googleapis.com/auth/userinfo.email
https://www.googleapis.com/auth/userinfo.profile
After that click update.
5. Last but not the least, check the Audience section and add your email as
a test user.
Are you using a Google mail i.e Gmail or a professional mail?
I’m using my personal gmail, but I’d prefer to send the email to my work email which has a proprietary domain
Thank you very much!
Have you been able to solve the problem?
Have you tried using the Gmail “Send an Email” module?
Here’s how to set it up:
Make sure you can sign in to Google Cloud Console with this.
Follow this main help centre guide on How to set up a custom OAuth 2.0 custom app in Make.
Search for the relevant Google API here: https://console.cloud.google.com/apis/library
Direct Link: https://console.cloud.google.com/apis/credentials
Here are some commonly-needed redirect URIs you need for your Google Cloud Console OAuth app. If you set these up, you can reuse the same GCP app for other Google apps and modules on Make.
https://www.make.com/oauth/cb/oauth2
https://www.make.com/oauth/cb/google
https://www.make.com/oauth/cb/google/
https://www.make.com/oauth/cb/google-custom
https://www.make.com/oauth/cb/google-restricted
https://www.make.com/oauth/cb/google-cloud-speech
https://www.make.com/oauth/cb/google-search-console
https://www.make.com/oauth/cb/google-analytics-4
https://www.make.com/oauth/cb/google-ads2
https://www.make.com/oauth/cb/google-ads2/
https://www.make.com/oauth/cb/youtube
https://www.make.com/oauth/cb/chrome
You are also required to insert the legacy URLs below from the old Integromat system that not been migrated to Make yet (same as the above list, but replace “make” with “integromat”):
https://www.integromat.com/oauth/cb/oauth2
https://www.integromat.com/oauth/cb/google
https://www.integromat.com/oauth/cb/google/
https://www.integromat.com/oauth/cb/google-custom
https://www.integromat.com/oauth/cb/google-restricted
https://www.integromat.com/oauth/cb/google-cloud-speech
https://www.integromat.com/oauth/cb/google-search-console
https://www.integromat.com/oauth/cb/google-analytics-4
https://www.integromat.com/oauth/cb/google-ads2
https://www.integromat.com/oauth/cb/google-ads2/
https://www.integromat.com/oauth/cb/youtube
https://www.integromat.com/oauth/cb/chrome
Note 1: Due to inconsistencies in Make’s implementation of the connections, there are two separate entries where has one is
google/- you might need one or the other, so we have to use both!
Note 2: Once you’ve set these up, you can use/reuse the same Google OAuth App ID + Secret for all the supported Google connections and modules on Make - you’ll just have to enable the relevant Google APIs!
Direct Link: https://console.cloud.google.com/apis/credentials/consent/edit
Insert make.com and integromat.com
Fill in other required fields
Click “Save and Continue”.
Click “Add or Remove Scopes”
Select 100 “Rows per page”, for each page, check all the rows, OR
Manually type in the scopes you need
Click “Update” at the bottom
At the last step/page, click “BACK TO DASHBOARD” instead of “Prepare for Verification”

You will need to set your OAuth application to “Production”, otherwise the credentials expire very frequently.
To do this, go back to “OAuth consent screen”
Then click the “PUBLISH APP” button
Then click the “CONFIRM” button
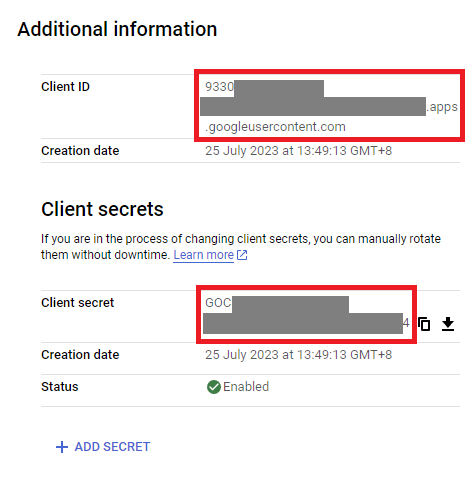
You can find the Client ID and Client Secret in the OAuth2 app you created in GCP, on the right-hand side of where you inserted the callback URLs in step 2:
Insert the GCP app client ID and secret here BEFORE clicking “Sign in”
(Gmail example)
OR,
You need a “Authorize Parameters” key of redirect_uri with the above Make OAuth2 callback URL.
Related Topics:
Hope this helps! Let me know if there are any further questions or issues.
— @samliew
I’ve done all of the steps, but I’m having problems with cenolis.com not being verified
In the audience section I can’t add an email. I’d like to add my own email so that I can use the email module.
That’s incorrect spelling, try re-copying the authorised URIs again. You might also be missing a step or two from the above.
If you require further assistance, please provide screenshots of what you have done.