You’ll need to publish the app to “Production” mode.
For full instructions, see below.
Follow this main guide on how to set up a custom OAuth 2.0 custom app in Make.
Provided below are additional supplementary instructions in case the above isn’t clear enough.
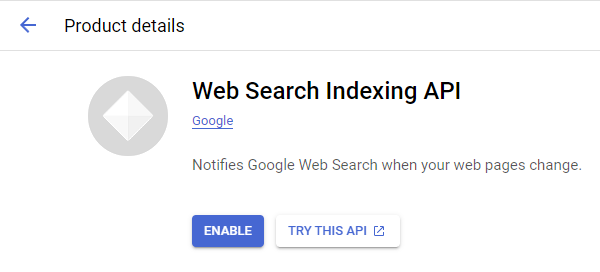
Enable APIs
1. Enable the relevant APIs that you want to use
Search for the relevant Google API here: https://console.cloud.google.com/apis/library
-
Go to each API page that you want to use, end click “Enable”
-
Usually you’ll want to enable at least Drive (includes Docs/Sheets) and Gmail.

OAuth Client
Direct Link: https://console.cloud.google.com/apis/credentials
2a. Create “OAuth client ID” Credentials

2b. Insert all the Google Redirect URIs for your app

Google Redirect URIs
Here are some commonly-needed redirect URIs you need for your Google Cloud Console OAuth app. If you set these up, you can reuse the same GCP app for other Google apps and modules on Make.
https://www.make.com/oauth/cb/oauth2
https://www.make.com/oauth/cb/google
https://www.make.com/oauth/cb/google-custom
https://www.make.com/oauth/cb/google-restricted
https://www.make.com/oauth/cb/google-cloud-speech
https://www.integromat.com/oauth/cb/oauth2
https://www.integromat.com/oauth/cb/google
https://www.integromat.com/oauth/cb/google-custom
https://www.integromat.com/oauth/cb/google-restricted
https://www.integromat.com/oauth/cb/google-cloud-speech
Note: Once you’ve set these up, you can use/reuse the same Make connection for all the supported Google apps & modules on Make - you’ll only have to enable the APIs for your custom app.
OAuth consent screen
Direct Link: https://console.cloud.google.com/apis/credentials/consent/edit
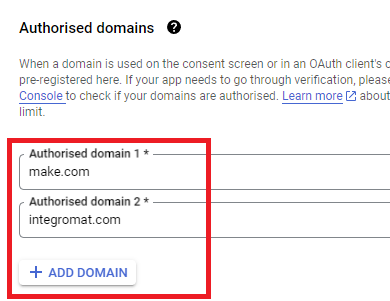
3a. Insert Two Authorised Domains
-
Insert
make.comandintegromat.com -
Fill in other required fields
-
Click “Save and Continue”.

3b. Add All Scopes
-
Click “Add or Remove Scopes”
-
Select 100 “Rows per page”, for each page, check all the rows, OR
-
Manually type in the scopes you need
-
Click “Update” at the bottom
3c. Step through and go to dashboard
At the last step/page, click “BACK TO DASHBOARD” instead of “Prepare for Verification”

3d. Publish your GCP OAuth2 app
You will need to set your OAuth application to “Production”, otherwise the credentials expire very frequently.
-
To do this, go back to “OAuth consent screen”
-
Then click the “PUBLISH APP” button

Create New Connection (HTTP, or respective Google module)
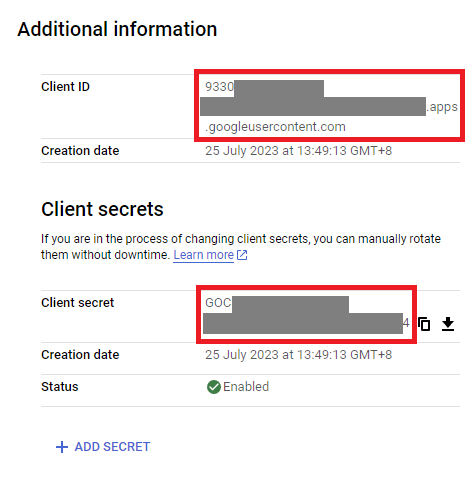
You can find the Client ID and Client Secret in the OAuth2 app you created in GCP, on the right-hand side of where you inserted the callback URLs in step 2:

4a. Specific Google module (Sheets, Docs, Drive, Gmail, etc.)
Insert the GCP app client ID and secret here BEFORE clicking “Sign in”
(Gmail example)
OR,
4b. HTTP OAuth 2.0 Request module
You need a “Authorize Parameters” key of redirect_uri with the above Make OAuth2 callback URL.
Hope this helps! Let me know if there are any further questions or issues.
— @samliew
P.S.: Did you know, the concepts of about 70% of questions asked on this forum are already covered in the Make Academy. Investing some effort into it will save you lots of time and frustration using Make later!


